|
The Zeltsman Approach to Traditional Classic Portraiture Chapter 7 Posing Women - Part Two In the chapters on Posing Men, I showed and explained how poses of men are always arranged only in a Masculine Composition. Then, in Part One of Posing Women, I introduced the Feminine Composition as the most elegant way to pose women. And I also showed how women may be effectively posed in a Masculine Composition. That feature becomes even more important when applied to head and shoulders Portraiture. (In this Chapter) There is an important distinction between full length, three quarter length, and head and shoulders poses. The first step toward arranging either pose, is the turn of the subject’s body to one side or the other. But in poses where the subject’s figures are included in the composition, such as the three-quarter and full length poses, the amount of that turn is controlled by the need to show the subject’s figure in proper balance. In head and shoulders poses, (where there is no concern with the subject’s figure), the first step toward arranging a pose in Feminine Composition is a turn of the head in the opposite direction to the body, and the amount of that turn is very critical, as I will show you now.
Compare the two photos (28 & 29) showing the same view of the face. Look at the distortion of the young lady’s neck on the left, and the difference on the right. I’ve seen that pose on the left many times. It is a result of beginning a portrait session by posing the subject first, and then directing her to turn her head to the camera.
Photo 30 is another example of accepting the body pose first, and then directing the subject to turn her head to show the desired view of the face. Photo 31 on the right, is the opposite approach: First, choosing to photograph that view of the face, and then posing the body to naturally support the chosen facial view.
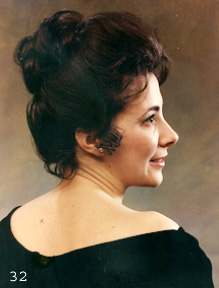
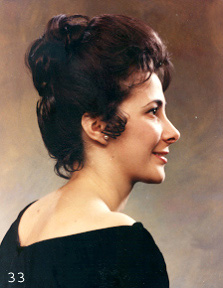
Photo on the left is a lovely profile, turned to the camera after the body was posed first. But look what happens as a result of a slight correction in the turn of the body in photo 33. An infinitely more elegant overall effect.
Photo 34 shows a shapeless stub of the body and a thick neck, supporting that lovely face and smile. Photo on the right shows the same nice face and smile, supported by a believable amount of body. The point made by the examples above, is the word "slight", a term I use constantly throughout my instructions related to any of the movements that are part of arranging a pose. As you saw in the above examples, those neck distortions occur when the subject’s head is forced to turn beyond the limit of its natural turn. Arranging a Head and Shoulders Pose
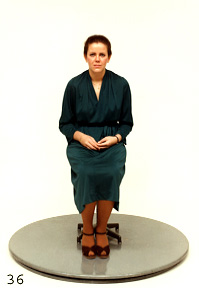
I arranged all head and shoulders poses on the turn platform shown in this photo. It is very convenient for relating different facial views to the camera by a slight turn of the platform, without changing the pose. The session begins by seating the young woman facing directly to the front, as you see in Photo F36, above. That is how every subject is seated during the short facial evaluation and planning period, before the posing begins (Details of that in Chapter 3).
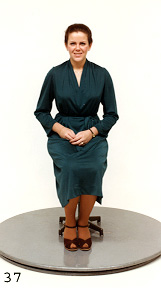
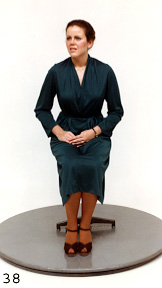
Note: The six photos of the subject’s entire figure, seated on a posing stool positioned on the turn platform, will now show how the head and shoulders feminine composition pose is arranged. But to judge each resulting pose properly, you must be able to see it effectively framed as just a head and shoulders portrait, and I recommend using two small cropping angles for that purpose. Photo F-37 shows the subject as she first sits down at the start of the facial evaluation session. Following that, you begin the posing session by directing her to sit up and bring her body to its fullest height, with a tiny lean forward. Her hands are brought up in her lap to bend the elbows, creating the arm diagonals. Her head is then turned slightly to her right to show the left two-thirds view of her face, as planned during the facial evaluation session, all illustrated in photo F38.
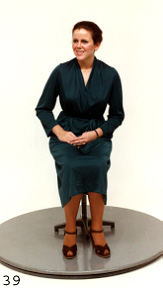
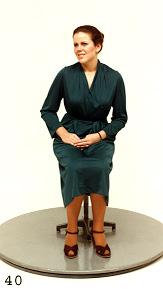
Next, you want to achieve a very slight lean of her body to the side to lower her left shoulder a bit. Direct her to separate the feet to provide her with the needed leverage for leaning to the side. This is illustrated in photo F-39. Note that her head is lined perpendicular to the shoulders, which is a masculine composition. Photo F-40 shows the head tilted toward the higher shoulder, and that is a feminine composition. I remind you to only view the head and shoulders close-up of this arrangement (by cropping).
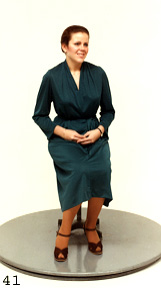
The pose in Photo F-41 is an exact reversal of F-40, and may also have either the feminine or the masculine head position. A review: Four steps to arranging the Feminine Head and Shoulders Pose. 1. The subject is seated facing front. She is directed to bring her body to her fullest height, with a very slight lean forward. To do this, she needs to separate and position her feet to provide leverage to maintain that posture. 2. Now, that she has the leverage, have her lean the body ever so slightly to her left to lower that left shoulder just a bit. 3. A slight turn of the head in the opposite direction to the body, to show the left two thirds view of her face. 4. A slight tilt of the head toward the higher (right) shoulder. The result is a pure, gentle, feminine composition.
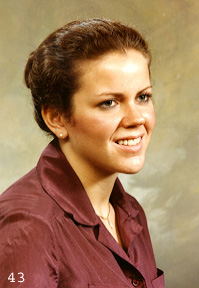
The lovely, simple classic portrait of the young lady in photo F42, was created by following the four steps to arranging the feminine head and shoulders pose . But that’s not all. In addition to the portrait showing the full front of her face, the following equally lovely portraits of the other 4 views of her face, were photographed without changing the pose in any way.
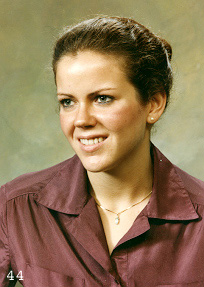
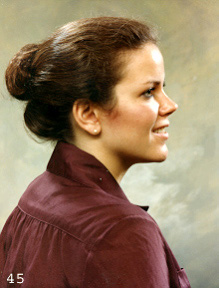
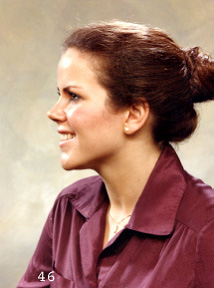
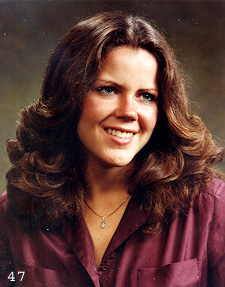
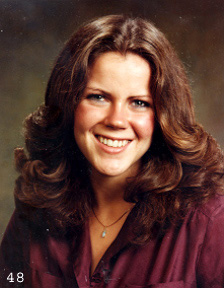
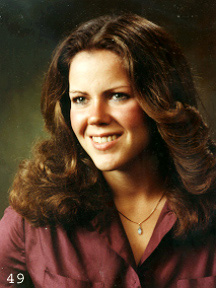
You, who are reading this, should check this out for yourself. Use a friend or a member of your family (attractive young lady), and following the directions of the four steps above, arrange her in a feminine head and shoulders pose, showing her two-thirds side view of the face, like in photo F44 above. Now, if you have, or can borrow a large empty frame (20 x24?), use it to crop your head and shoulders pose, and do the same as you get in front of each of the five facial views, you will see five portraits available with no change of pose. Obviously, bringing the camera in front of each of the five facial views is not a practical option. We must therefore somehow move each pose to face the camera, without disturbing the pose. You can understand now why I always arranged head and shoulders poses on that rotating platform. But, when you don’t have such a rotating platform, you work a little harder. After you’ve arranged and photographed the first planned view of the subject’s face, step over in front of the other facial views to see each pose from that angle. If you choose to also photograph one or more of them, I’m sure you could figure out how to turn that pose to the camera without disturbing it. Note that the seat of the posing stool the subject is sitting on turns freely. As I am nearing conclusion of the chapter on Posing Women, I want you to see three more portraits of this young woman, and comment about it.
A classic head and shoulders close-up portrait of an individual subject is a most intimate form of portraiture. Everything is planned to attract a viewer’s attention to the subject’s face and expression, and to keep it there. The planning includes coordinating clothing and background. It applies to both low key or high key portraiture. One must avoid any distracting elements that would draw the viewer’s attention from the subject’s face. The three images above are an example of such planning. Some final comments: These two Chapters on Posing Women, explain and show how arranging the woman in the Feminine Composition, offers an infinite variety of poses, as head and shoulders close-ups, or three quarter or full length, seated or standing, all of the same pose. The variety I am referring to here, is not a choice of just cropping portions of the composition, but particularly a choice of all or some of the facial views as a head and shoulders portrait. (Illustrated above) A timely reminder: Each facial view positioned in front of the camera requires readjusting of your key lighting. Portrait Lighting - Chapter 13 |


Rehosted on:
